Nostalgia Twist · OMG · Quilting · Rulerfoot quilting

An Early Inheritance

Hi Everyone and Welcome to My Blog,

I’m having a late start to my blogging adventure this week.  I was so very busy these last couple days, but I’m here now to catch you up.

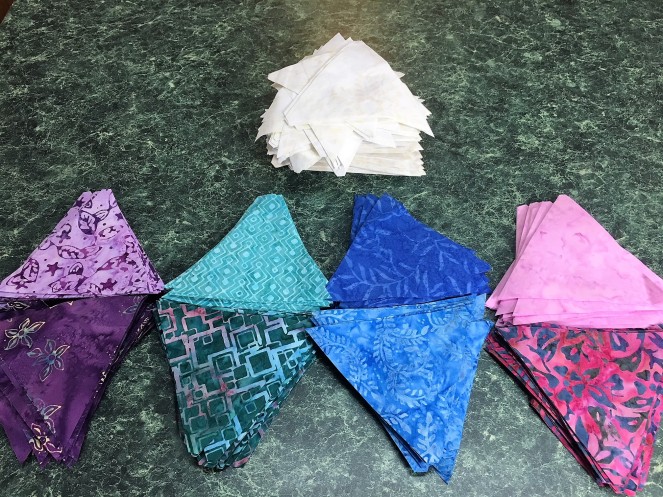
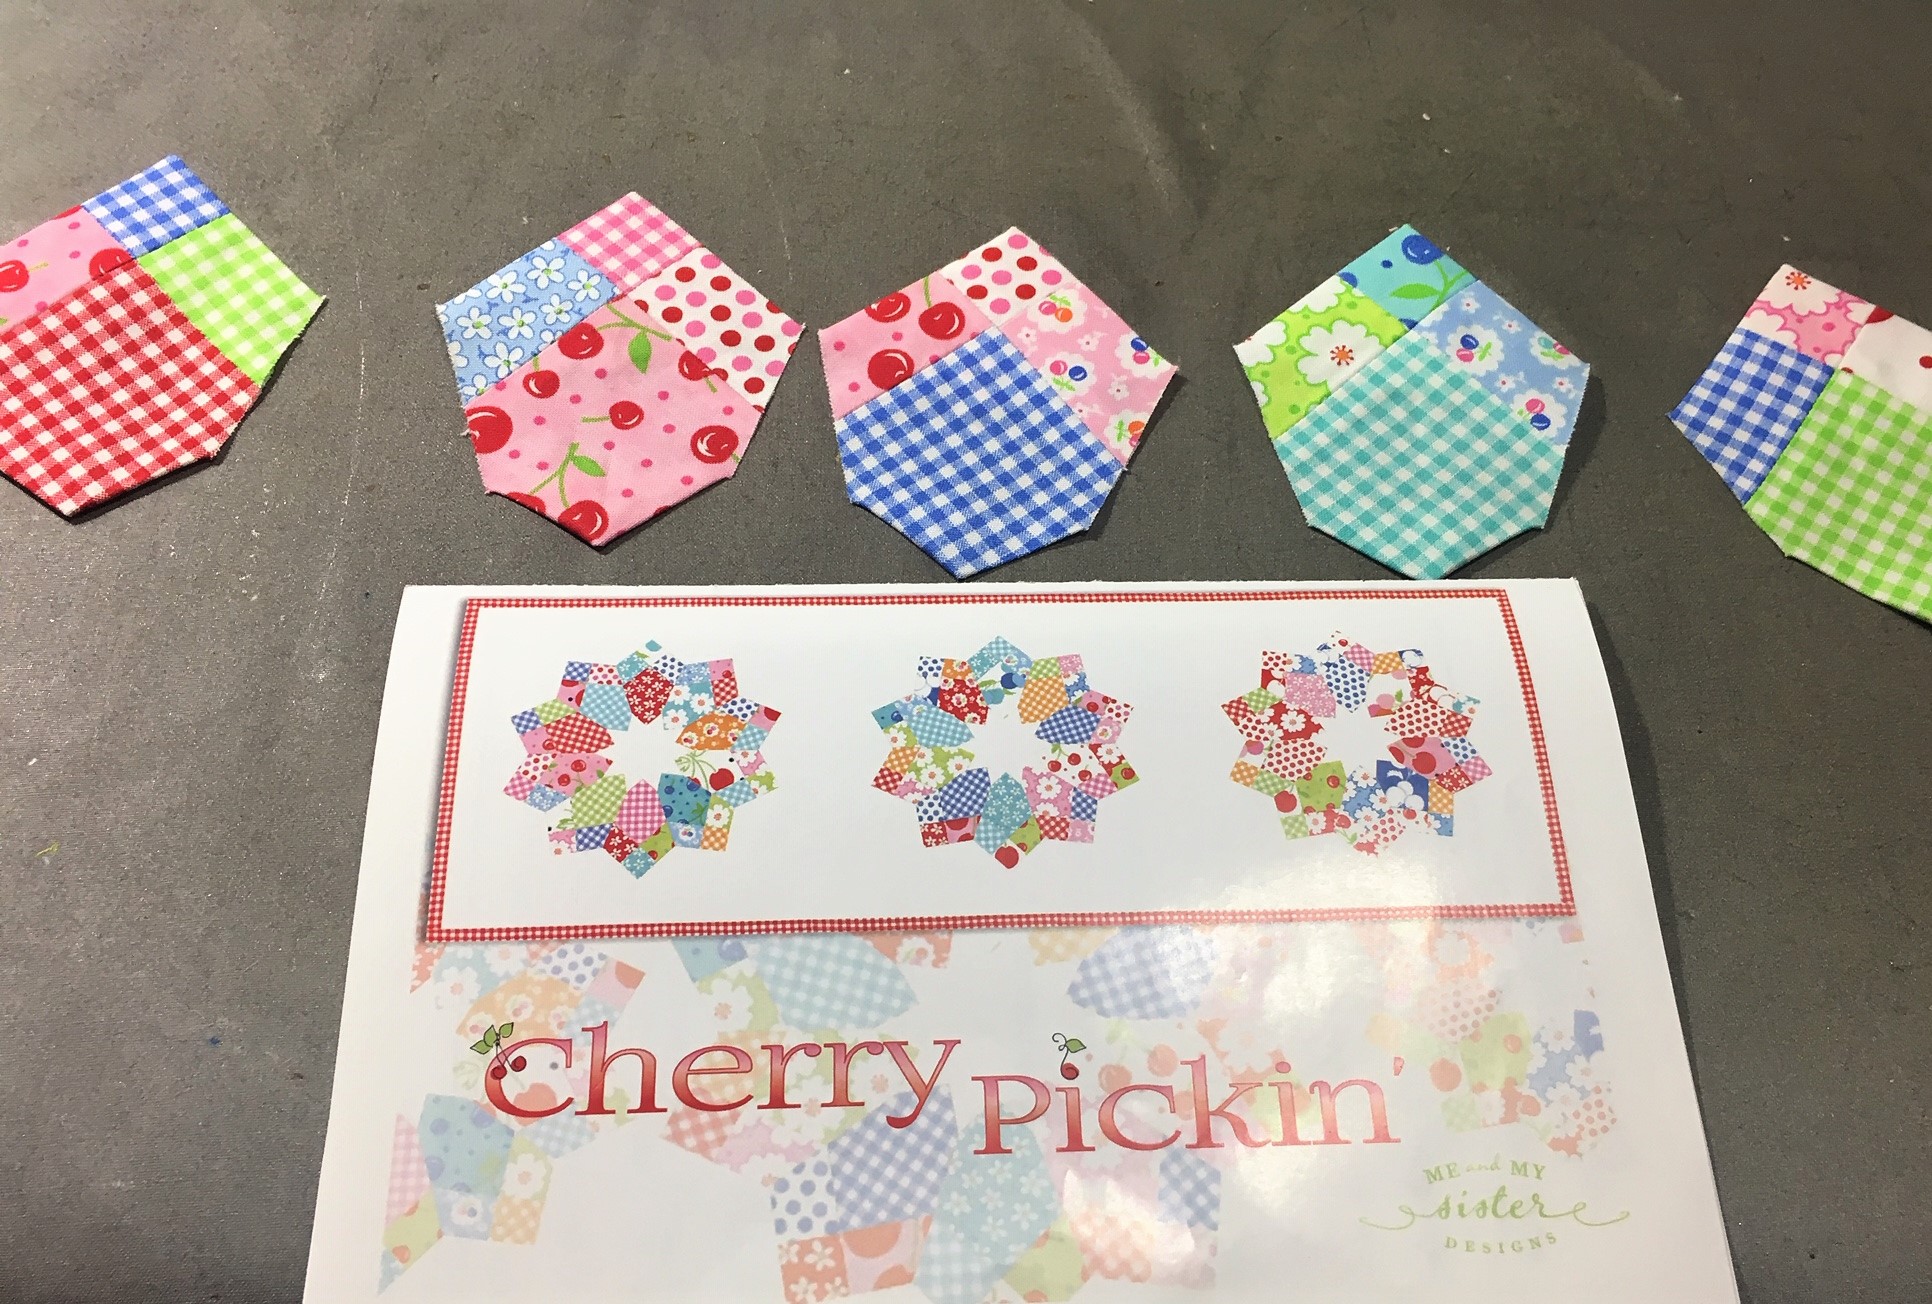
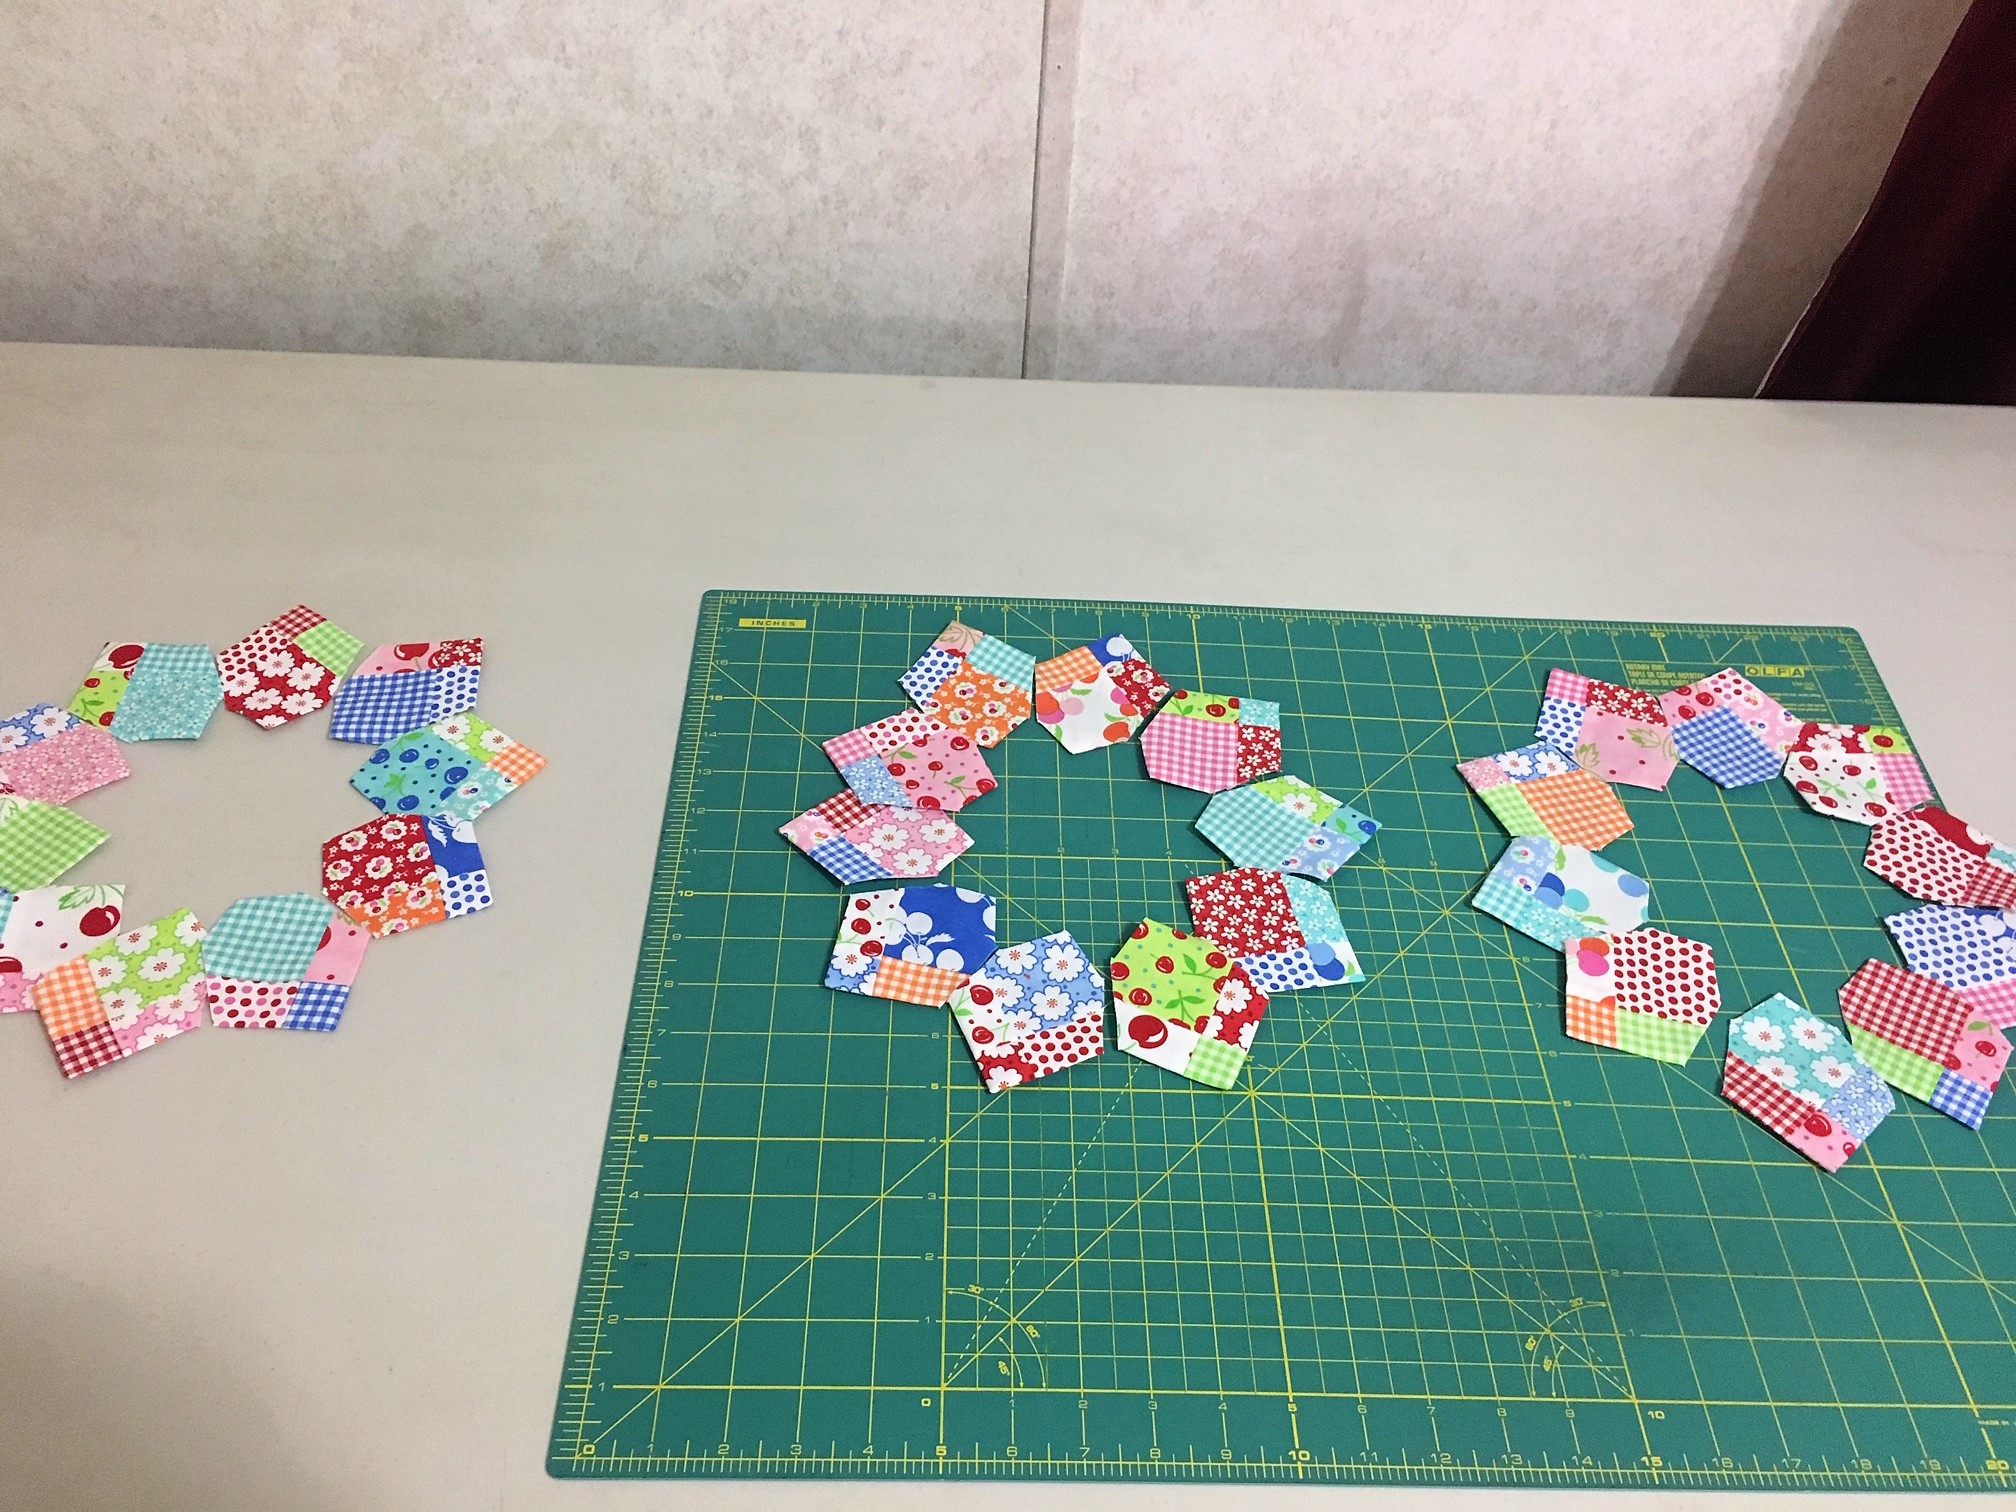
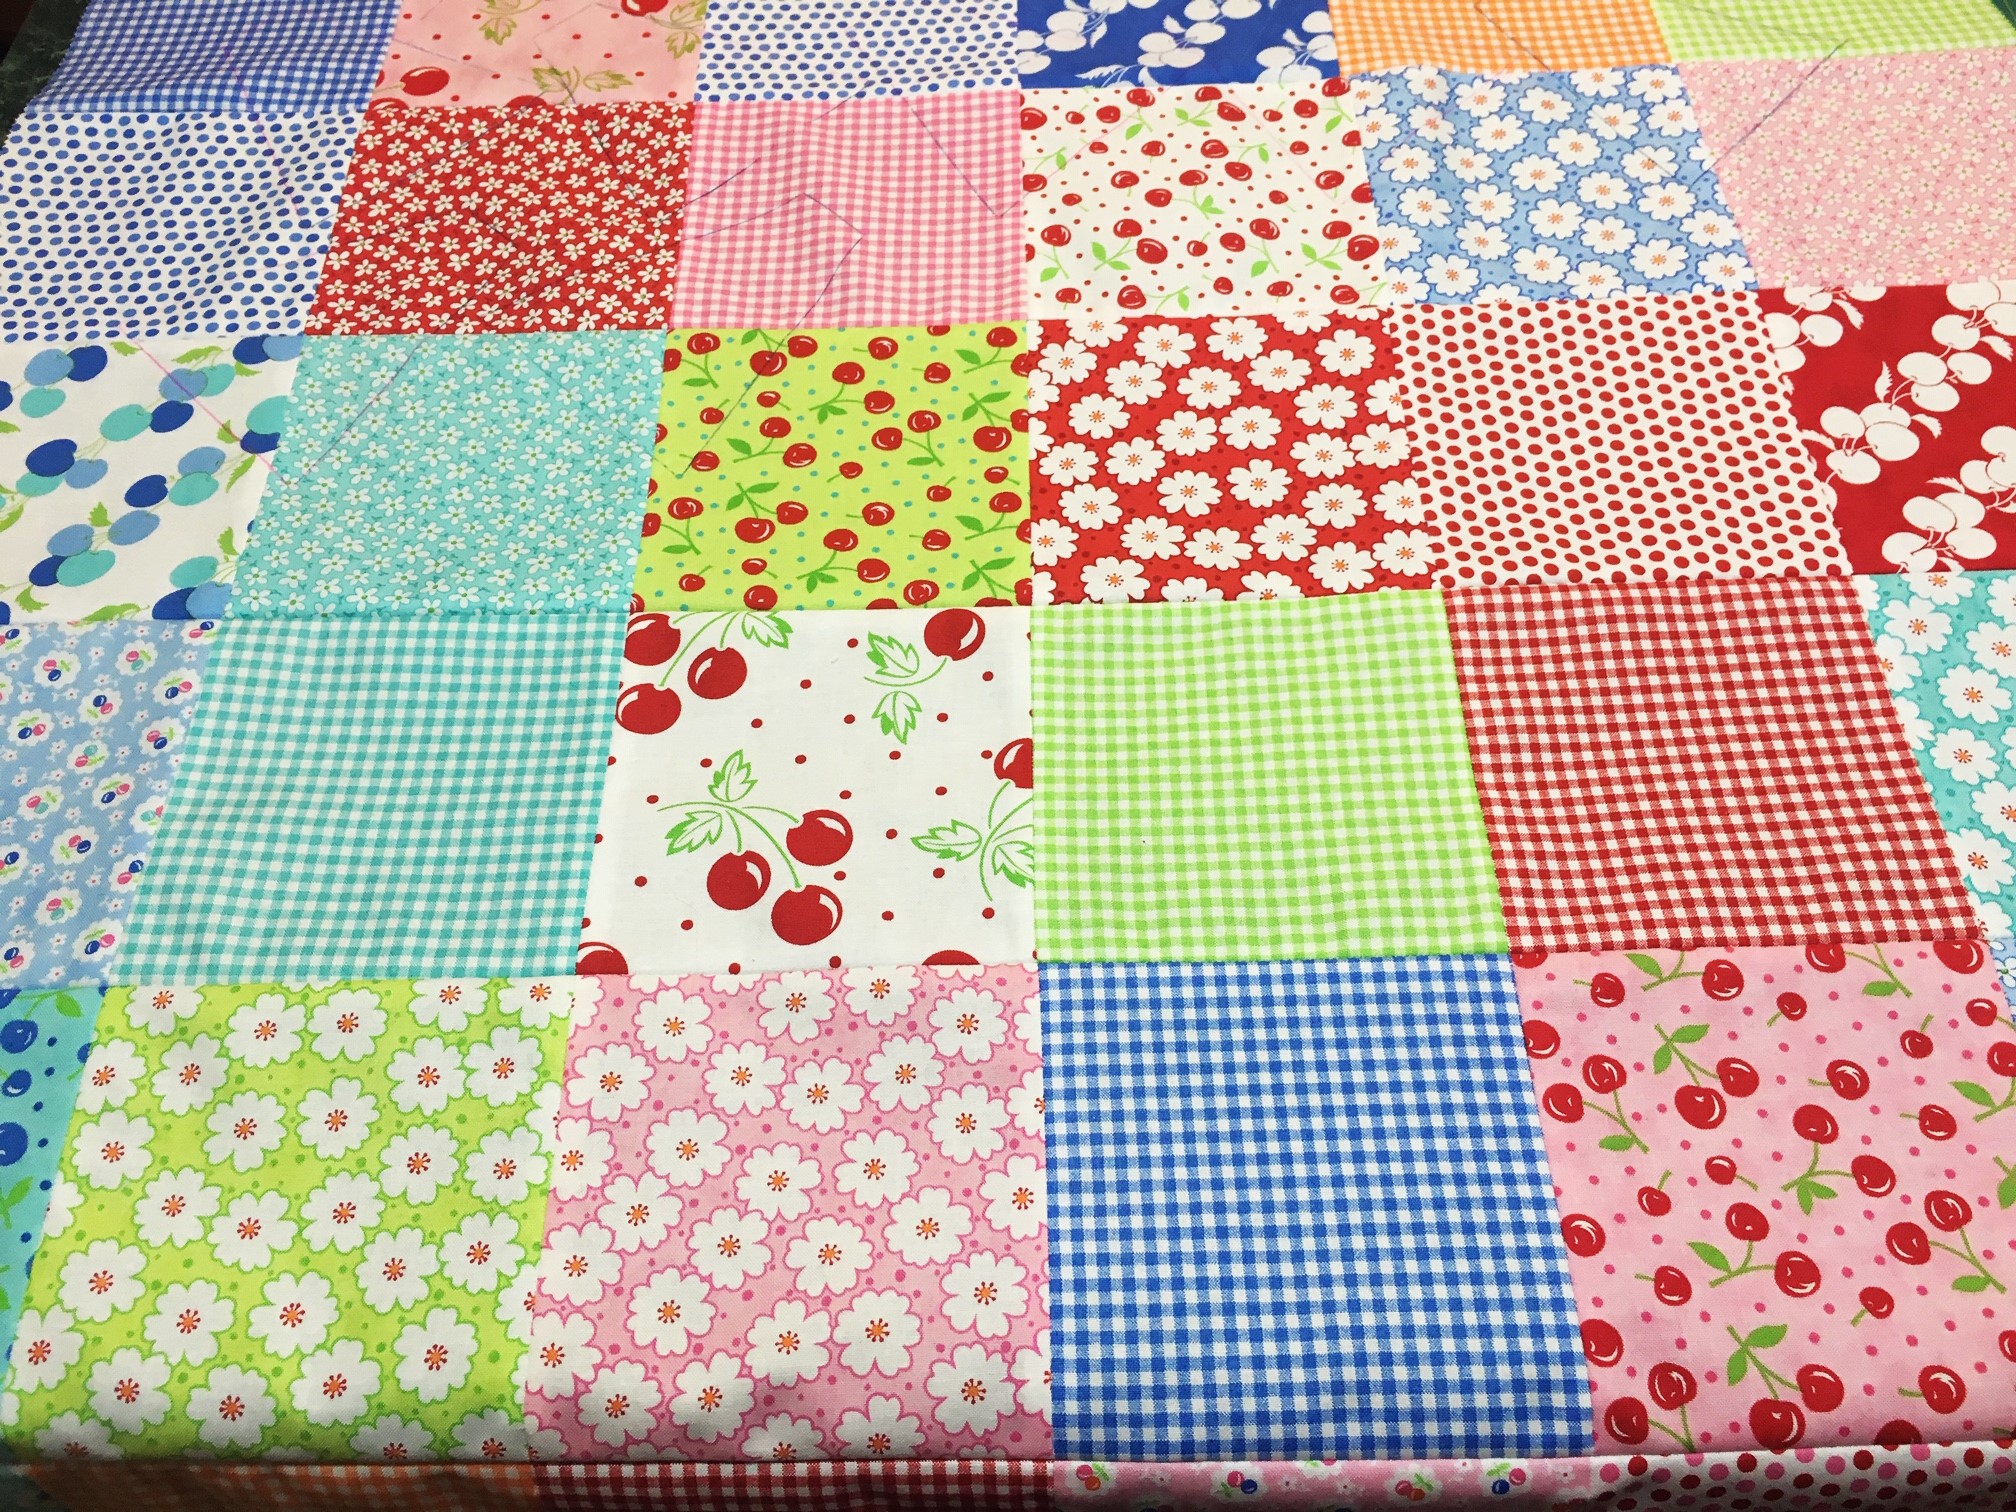
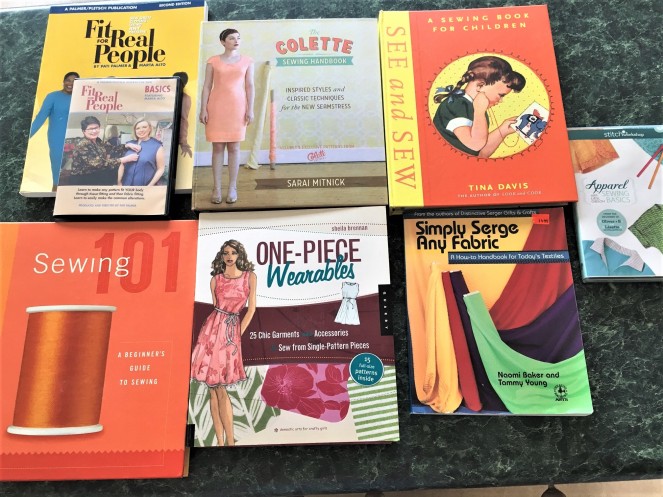
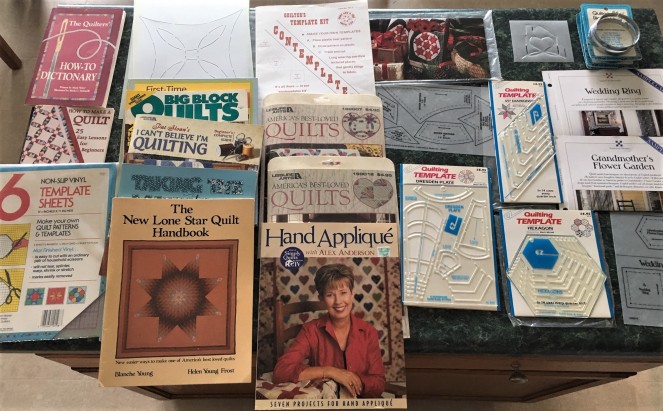
My Mom has been spring cleaning and clearing out her house.  There is a church garage sale and it seems she is trying to declutter.  Before she donates the items she called me over to see if there was anything I may have wanted.  She has done a few quilts over the years.   Mostly for her Grandchildren.  I have mentioned before she is a garment sewist and has quite a bit of sewing supplies.  Well she was wanting to relieve herself from numerous books and patterns that she never used.  Some weren’t even opened. When I left her house I had three grocery bags full.  Take a look at all these wonderful goodies.  I could quilt and sew for a long time with all these patterns and accessories.  I feel like I just won the lottery.

IMG_0737

IMG_0736

Now on to my quilting adventures.  It time for me to link up my successful goal for this month.

OMG 2018 Blog logo Mar

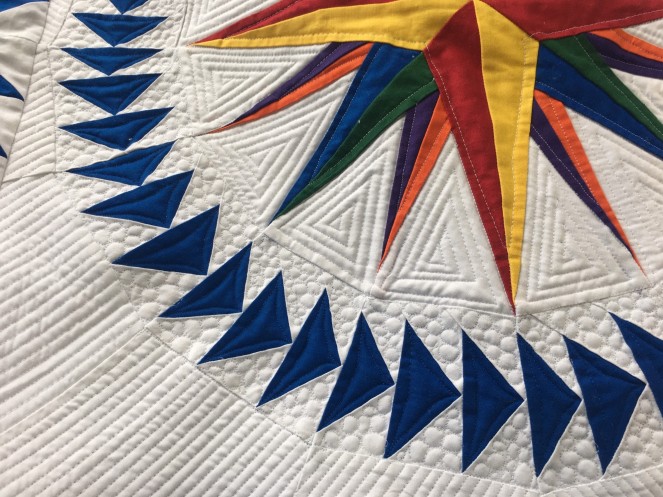
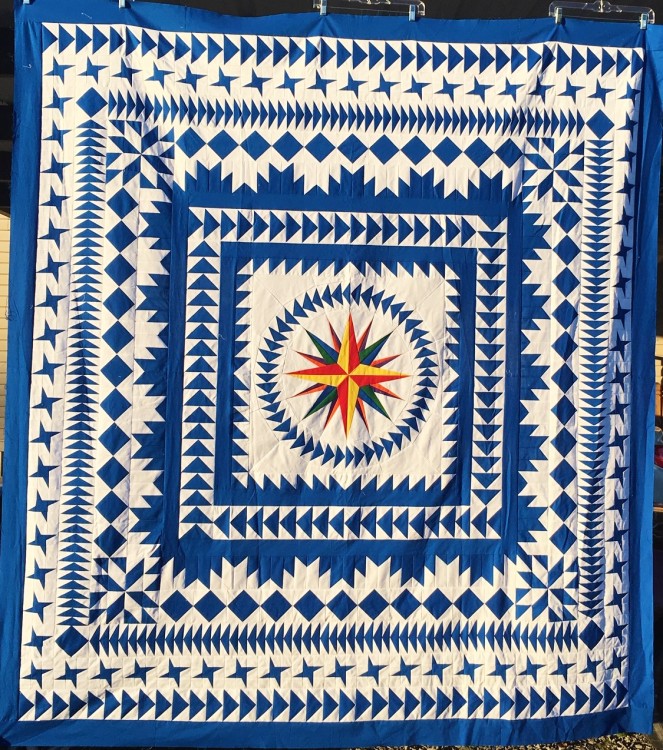
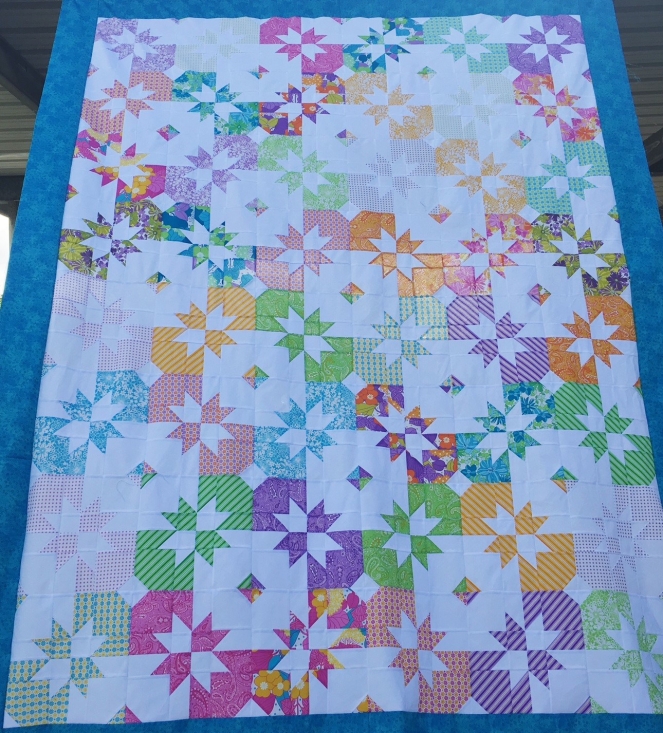
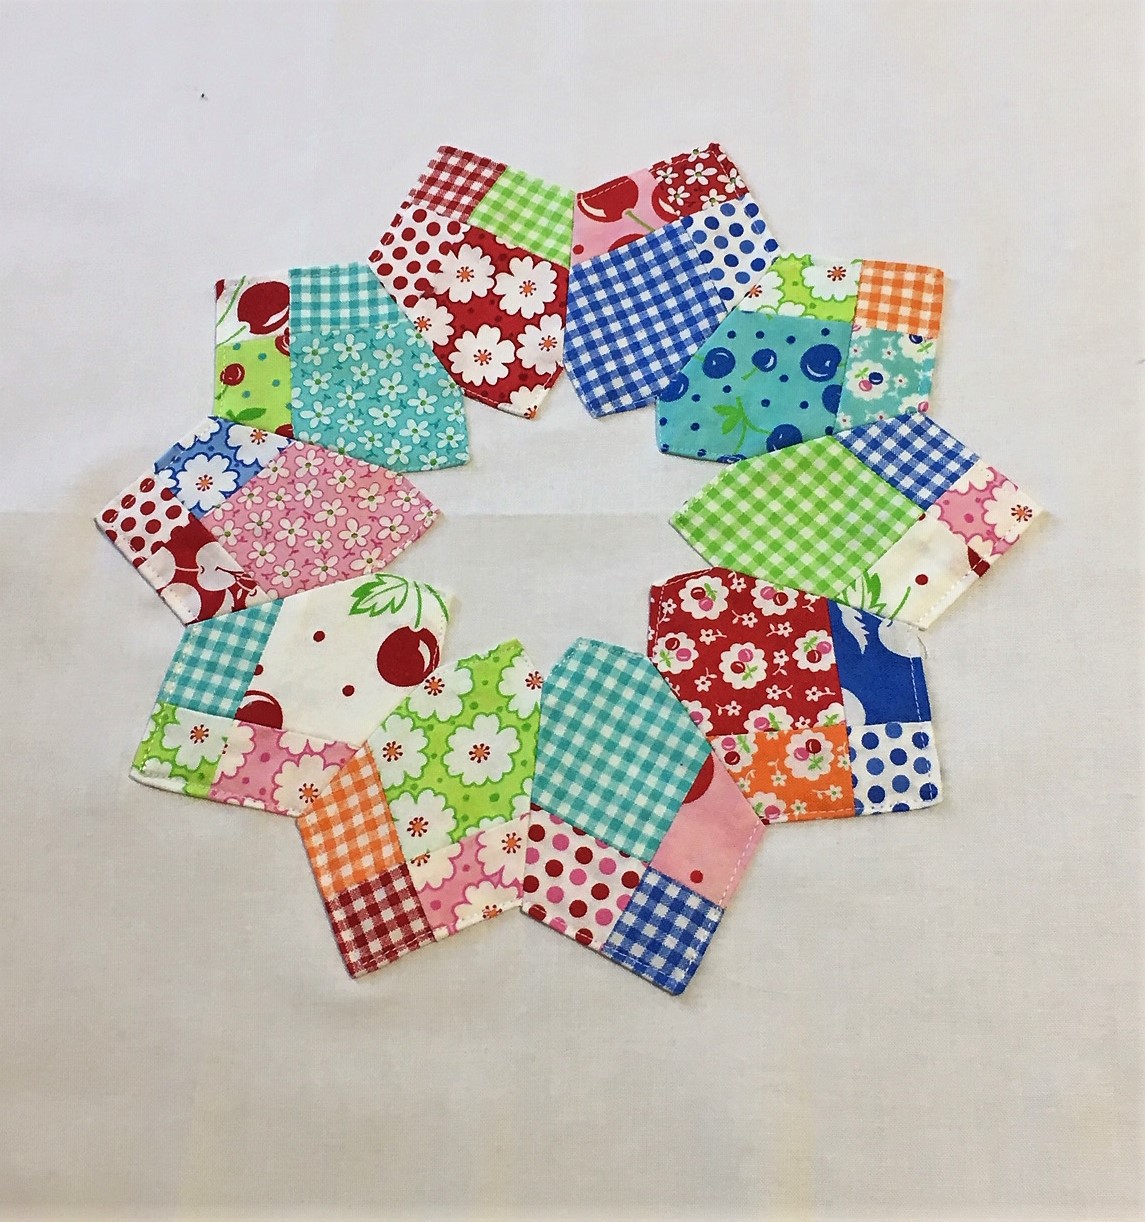
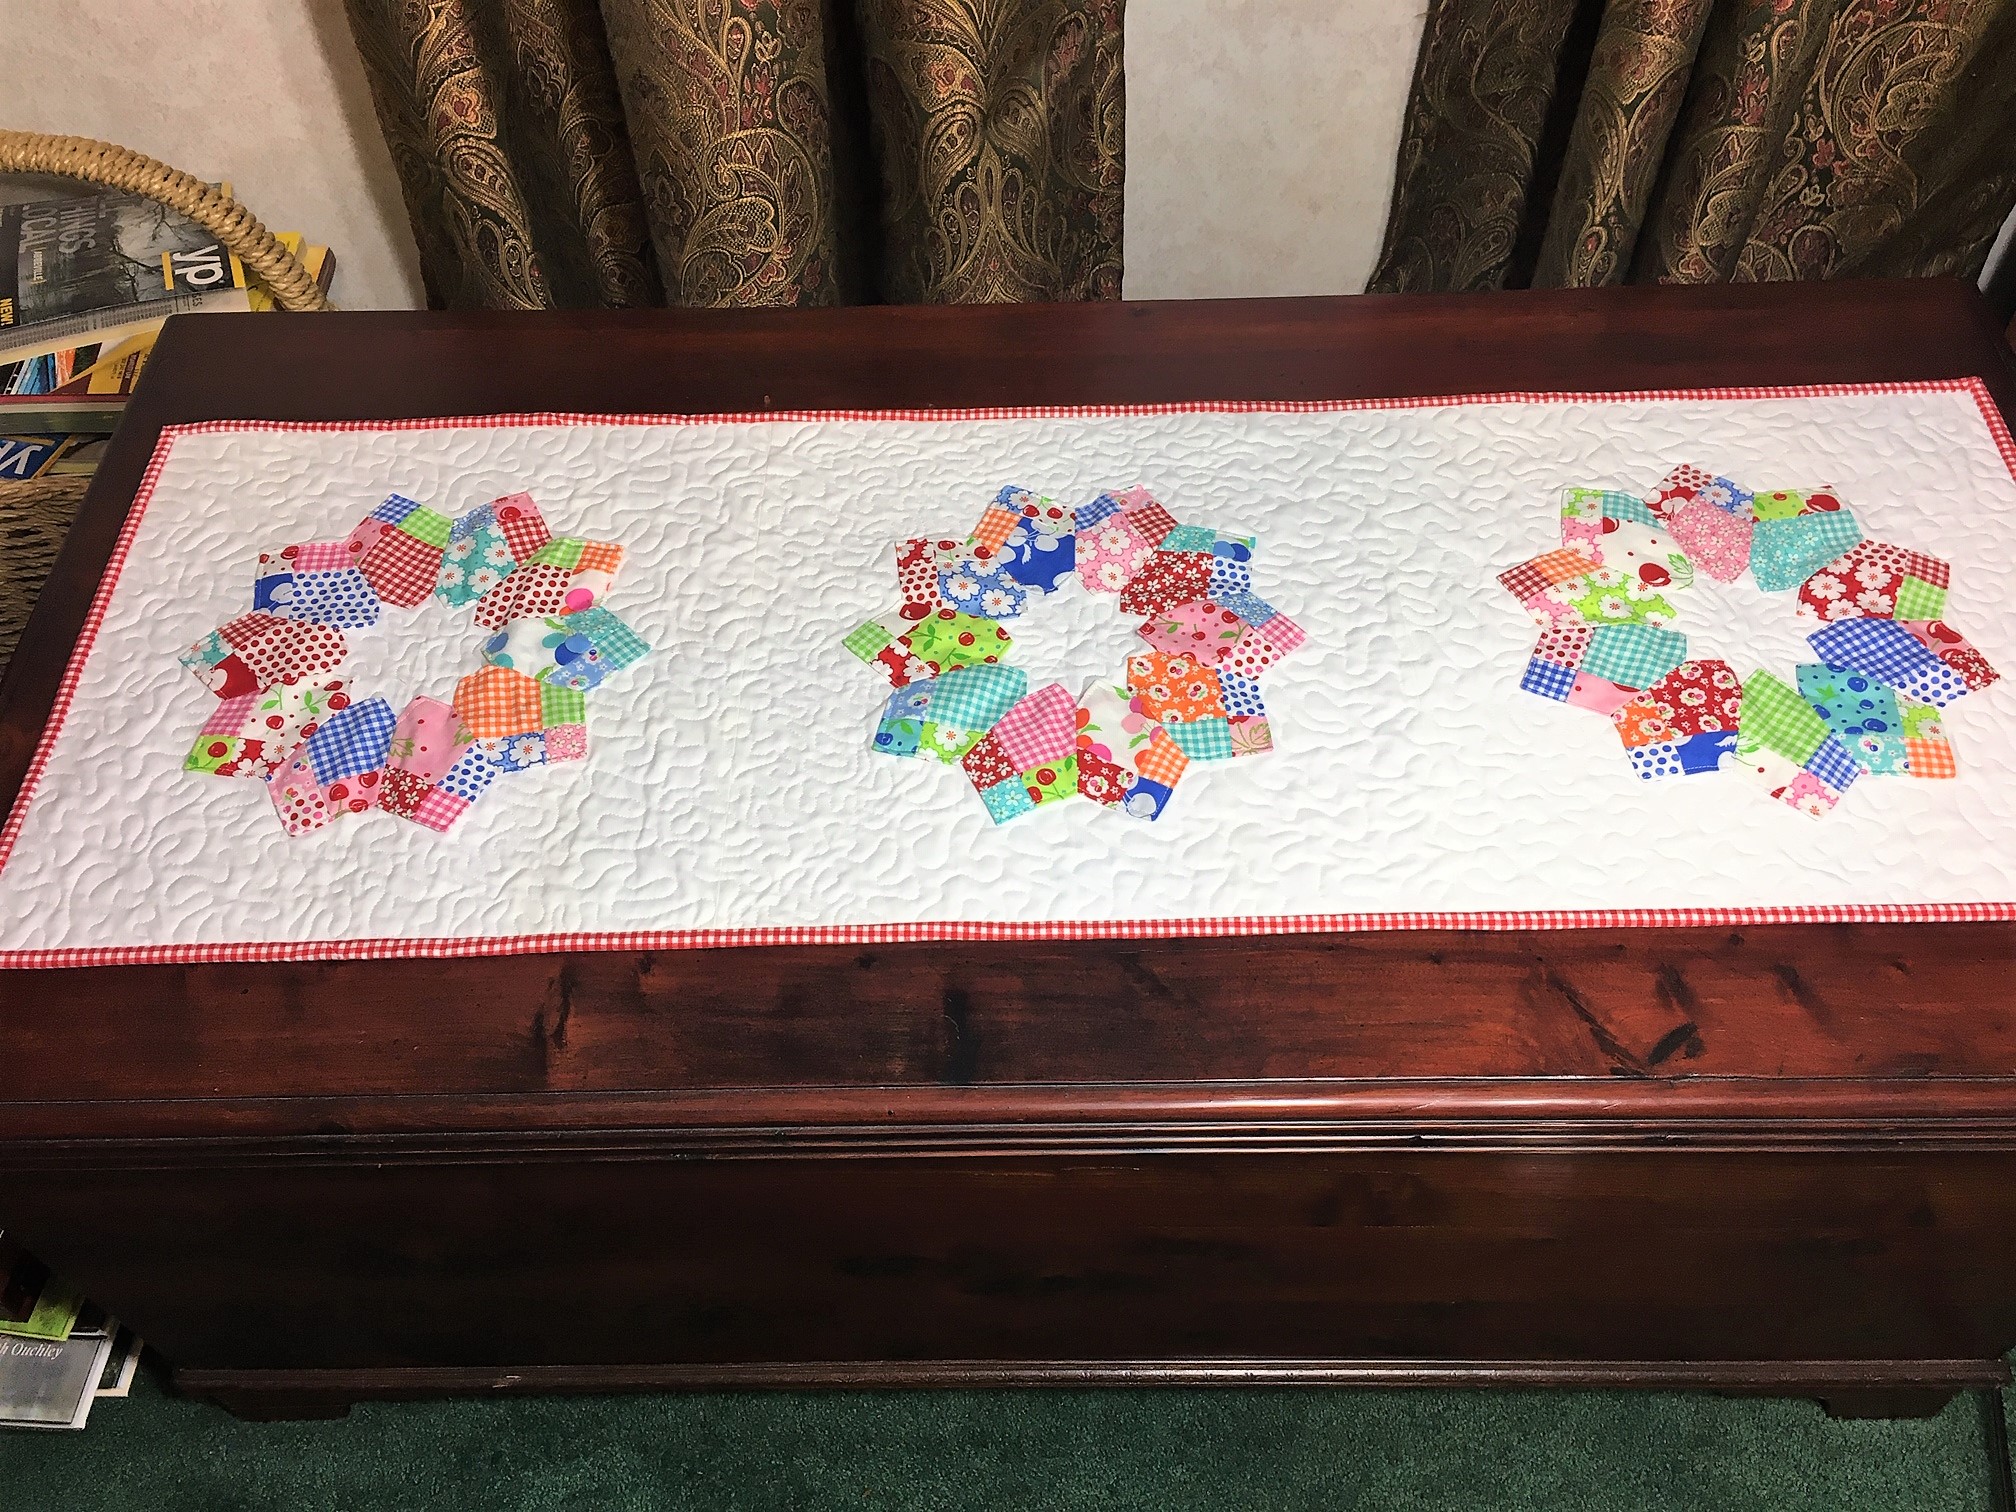
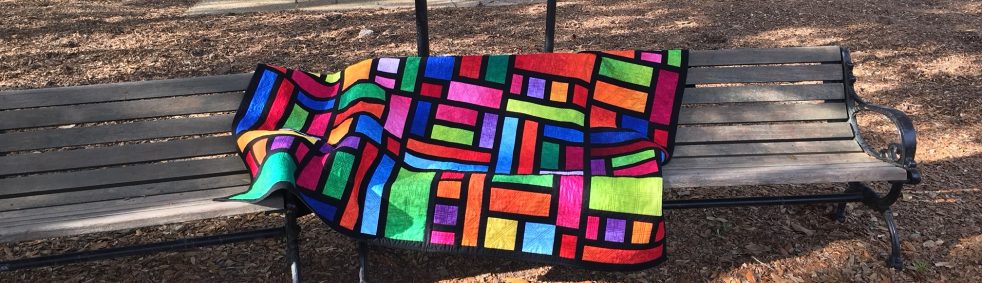
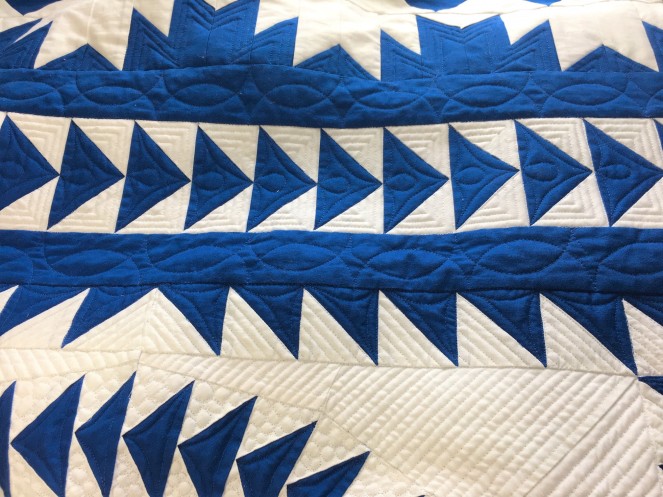
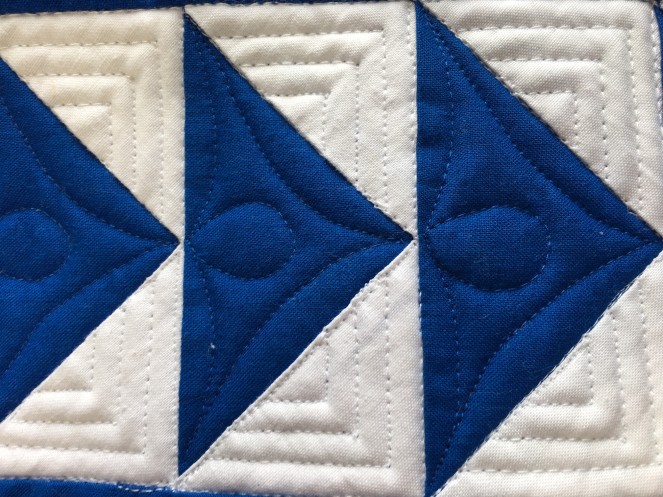
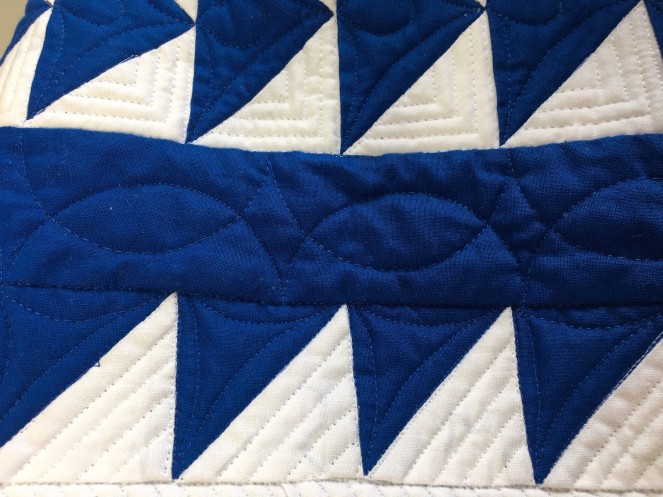
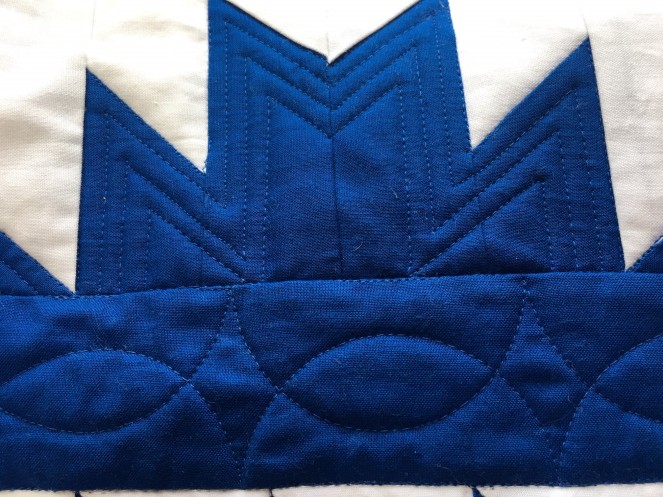
Earlier this month I linked up my goal for the month here.  Throughout the month I’ve been diligently working on quilting my Nostalgia Twist Quilt.  When the month started I only had the medallion quilted and have since completed 4 1/2 rounds.  I mostly used my ruler, but for the triangles I winged it and did some free motion.  So far I like the results.  It’s far from perfect, but I’m still learning.

4 rows

looped triangles.jpg

border loops.jpg

mountains

Well that’s all I have for now.

The linky parties I usually participate in can be found by clicking this link.  Please visit them and see what others are up to and  leave some comments and encouragement.  There are many bloggers out there who share their tips, projects, and tutorials to inspire us.

Thanks for stopping by.

Cherie

Embroidery

A Hand Embroidery Project

Hi Everyone and Welcome to My Blog,

If you follow me or have read some of my blog posts, you know that I have to travel for my job.  I have the official rotation now that the lady I’ve replaced has retired.  Management would like me to work at their base every other Thursday and Friday.  With their base being 2 1/2 hours from my home and a car service driving me as well as a night in a hotel room, I’ve been looking for a hand project that I can take with me.

I considered a couple things English paper piecing, hand applique or some sort of embroidery or cross stitch.  I consulted with my friend Roseanne @ HomeSewnByUs and she liked the embroidery project I was interested in.  I’ve been surfing the website of Crabapple Hill Studio but at this point I really didn’t want to start a major project.  I wanted some sort of practice run before I tackle anything big.  I was admiring her BOM called Girl’s Getaway but I’m not ready for that just yet.  She did have a free downloadable patter featuring a bouquet of flowers representing the seasons.  So I thought that it would be right for me.

They have videos of a technique that tints the fabric with crayons that looked fun to do and adds interest to the piece.  So I ordered some floss, needles, and the recommended pigment pen from them and downloaded the pattern.  I had to go to the big box craft store to purchase a light box to transfer the pattern to my fabric.  I did get to use a nice coupon and received a nice discount on the item, but as we all know I had to walk up and down each aisle before I found it as there was no one around to ask.  Of course I picked up the crayons from the big W.

Here is a picture of the pattern and fabric on the light box while I traced it.  You can’t tell from this photo because the back lighting is drowning out the colors but I am using a 05 brown pigment pen.

Tracing

After I completed that I got my little girl on and started coloring the fabric.  The instructions said to first color the sections with a white crayon.  This seemed to smooth out the texture on the fabric that allowed the colored crayons to be added easily and reduced any streaking.  I noticed that if I used a circular motion this also helped.  Below you can see how it ended up.  It may not be the best, but for the first time I’m good with it.

Coloring

So now I can get to stitching.  I am hopeful that my ride this Thursday will be smooth enough for stitching.  The road is not to great so I’m afraid I will be sticking myself the whole way there.  I will provide an update as I go along.

This weeks orchid is one that the guy’s at my office bought me for Valentine’s day.  Aren’t they so sweet.  When they saw my other Orchid blooming and my enjoyment they went to the grocery store and pick another up for me.  Yellow orchid

Well that’s all I have for now.

The linky parties I usually participate in can be found by clicking this link.  Please visit them and see what others are up to and  leave some comments and encouragement.  There are many bloggers out there who share their tips, projects, and tutorials to inspire us.

Thanks for stopping by.

Cherie

Sew Alongs · Triangles Quilt

Triangles

Hi Everyone and Welcome to My Blog,

Last year in July I joined a Sew Along that Roseanne with Home sewn by us hosted.   This was a no stress, no deadline, no prize sew along, just for fun.  These are my favorite kind.  I can go at my own pace and not worry if I fall behind. Which I always do.  I also enjoy seeing everyone’s adaptation of the patterns we can choose from.

I chose the triangles pattern by Peta at She Quilts A Lot.  I picked out some lovely batiks from my local quilt shop and a triple 60 degree ruler from Amazon and go to work.


Triangles Quilt Fabric

Triangle Ruler

Triangles Cut

And this is about how far I got last year.  I had a couple other project going on and this one got left behind for a while.  I finally got back to it and laid out some blocks to take a look.

I was liking what I saw so I kept at it and here is how it looks now.  Top

This will be the next UFO from last year that is ready to be sandwiched and quilted.  I think it needs some random quilting on it.  I’m going to start doodling some forget me nots and see if I can FMQ that design.

I have another Orchid to show you.  As I mentioned the other week.  I have a fascination with orchids now that I’ve been able to make one bloom.  So on Valentines Day my husband brought me one home.  I think it is very beautiful and looks good with this quilt.  Orchid

Well that’s all I have for now.

The linky parties I usually participate in can be found by clicking this link.  Please visit them and see what others are up to and  leave some comments and encouragement.  There are many bloggers out there who share their tips, projects, and tutorials to inspire us.

Thanks for stopping by.

Cherie

Nostalgia Twist · OMG · Quilting · Ruler Work

Onward to the Next

Hi Everyone and Welcome to My Blog,

I’m still riding high from last weeks finish and now I’m on to the next quilt.  2018 was a year of piecing with very little finishes so this year I’m determined to finish all my UFO’s before starting any new projects.  I have to say I have a waiting list of quilts that I want to make that just keeps getting bigger each day.  I am using this want of starting a new project to push me to hurry and finish the one’s I’ve already got going.

So my next project is quilting my Nostalgia Twist Quilt.  I finished this quilt top in January and put it off to the side for a while to consider my quilting options.

img_0668 (1)

I mentioned when I finished it that I’d like to do some denser quilting in the white area with some lighter quilting in the blues.  Unfortunately, I do now own a long arm yet so I have to quilt this on my domestic machine.  Well, this will take a while, but I’ve made some progress after some marathon quilting.  I have to travel this week so I’m not sure if I can keep up the pace this week.  I am off tomorrow for Mardi Gras and do not plan on attending any parades.  So tomorrow will have to be my big day.

What I’ve been doing on it is ruler work.   A while back I purchased a ruler foot set and tried it out.  It was the universal kind and didn’t work for me very well.  The “Beast” as I like to call my machine hated it.  It skipped stitches and did not produce anything I could say that I liked.  However, last year Janome came out with the ruler foot upgrade for my machine that came with the correct foot as well as a couple of others and also the upgrade to the software that raised the foot correctly.  It made all the difference in the world.  It does the ruler work wonderfully now.

Ruler Foot Upgrade

Now that the ruler foot is working on my machine, I’ve decided that it would be easier to so some of the quilting using this.  I’ve done some straight line quilting and I don’t have to turn the quilt every time I change directions.  It’s very much a time saver.  Take a look at some of the designs.  I don’t need to mention that the pebbles were just freehand.


Quilting1

Well that’s about as far as I got.  As I practice, I’m getting better at regulating my stitch length, but it’s still not where I’d like it to be.  Hopefully, by the time I finish this quilt I should be better at it.  I’m finding the speed that I like with the motion of my hands.  It’s sort of like finding the sweet spot.

OMG 2018 Blog logo Mar.jpg

For my OMG this month, I’d like complete a couple more rows of quilting.  I don’t think I can finish the whole thing since the quilt is very big, but by the end of the month I hope there will be some pretty good progress made on it.

Well, that’s all I have for now.

The linky parties I usually participate in can be found by clicking this link.  Please visit them and see what others are up to and  leave some comments and encouragement.  There are many bloggers out there who share their tips, projects, and tutorials to inspire us.

Thanks for stopping by.

Cherie


2019 Finishes · Disappearing Hour Glass · Domestic Machine Free Motion Quilting

Checking in With a Finish

Hi Everyone and Welcome to My Blog,

I’m sorry I haven’t written very much lately, but I’ve been in a funk.  The weather here has been cold/hot with lots of rain.  And while I read about others who get to work in their sewing studios during this time, I just feel like I want to plop on the sofa and do nothing.  It warmed up for a time and now the weeds are growing like crazy.  I’m a big allergy now.

I want to give a big ole shout out to my friend Karla at My Sewful Retirement for pinging me in her blog.  She did a great job learning to paper piece.  Aren’t those points just perfect?

My job is going good and I now have a final travel rotation.  I will be in Larose every other Thursday and Friday.  It doesn’t seem to bad so far.  I’ve been a little stressed with all the newness of it and maybe that may have something to do with my bit of the “don’t wants”.

Mardi Gras is nearly here and with it come lots of parades and fun.  We don’t really go out in the crowds any more.  I’ve done enough of that when I was young and dumb, but an extra day off never hurts.

I’ve got a finish to show you.  My first one of 2019.  I know, I know, I’m pretty slow.  But I really like how it turned out.  It’s a gift for someone but I’m not telling who.  When their birthday comes around then they will know.  I think it’s bright and cheerful just like the recipient. This was a disappearing hour glass block from a Jenny Doan tutorial.

Finiahed

I backed it with some yardage I got at a bolt sale.  Every year a representative from Quilting Treasures comes to town with a presentation on how they make the fabric and bring tons of end of roll bolts for us to buy at a reduced price.  You have to buy the whole bolt and they are usually 5-8 yards.  I usually like to pick backing fabrics at that time.  I had this quilt in mind when I got these.

backing


For the quilting I did a fun stipple on it.  I had a great time with it.  It was fast and easy.  Here’s a close up.  I think I will do this again and again.  I do love the mindless sewing.  Since I only have a domestic machine, it’s pretty hard to man handle the quilt and make too many turns.

Stipple

One more thing before I go, about 2 years ago I had a boss here who was transferred to Paris.  That is where our HQ is.  She left me this Orchid that had already lost it’s blooms.  I’ve seen them in the grocery and hardware stores and always thought they were beautiful.  So I You Tubed it’s care and I was finally rewarded.  These have been blooming since December and I’ve been told they blooms can last 3-6 months.  I can’t tell you what I did.  Really I just remembered to water it every week.  Now I’m hooked on Orchids.  I just want more and more of them.  I got some more for Valentine’s Day but I’ll show you those next time.

Orchid

Well that’s all I have for now.

The linky parties I usually participate in can be found by clicking this link.  Please visit them and see what others are up to and  leave some comments and encouragement.  There are many bloggers out there who share their tips, projects, and tutorials to inspire us.

Thanks for stopping by.

Cherie

Nostalgia Twist · Paper Piecing · Piecing

UFO Busting

Hi Everyone and Welcome to My Blog,

Last year for me was mostly confined to piecing with not many finishes.  That being said my UFO stack is more than I want.  So I’ve made a deal with myself not to start any big projects until I complete them.  This deal does not unclude making a list of what I want to make next.  I’ve even purchased some fabric last week for the next project.  It sure is hard not to start it yet.  Let’s see if I can be strong.

At this time I have three finished quilt tops with one more in the sashing stage.  Hopefully, you will see some good finishes soon.  I’m almost done with my OMG for the month and will start quilting the next.

Last year I did a pattern for my friend Denise with For the Love of Geese.  She designs the best patterns.  And this one is certainly a beauty.  It’s quite big and will need a bunch of quilting.  I’m up for the challenge and can’t wait to show the progress.  My thoughts on the quilting at the moment is to do some walking and free motion quilting.  I think it would be nice to quilt it lightly in the color areas with more dense quilting in the white block.  I’m hoping the effect will be that the colored areas will stand out more. img_0668 (1)

Wish me luck with managing this task.  I can’t wait to get it under the machine.

Well that’s all I have for now.

The linky parties I usually participate in can be found by clicking this link.  Please visit them and see what others are up to and  leave some comments and encouragement.  There are many bloggers out there who share their tips, projects, and tutorials to inspire us.

Thanks for stopping by.

Cherie

Disappearing Hour Glass · OMG

A January Goal

Hi Everyone and Welcome to My Blog,

I wanted to update everyone about my new basting method.  Doing it on the floor has not agreed with my body.   My knees and back are usually hurting for a time after I’m done.

I watched a You Tube Video that had a great idea on how to baste on a table.  I must say now that I’ve done it I will never go back.  I went to the local Home Depot and picked up the supplies.  I didn’t spend much, maybe $20.  My Hubby was kind enough to cut the pvc into pieces for me and file the edges so no beautiful quilt fabric would get snagged.

Here I am starting with the quilt top.  Notice that I’m lining up the edge of the quilt with the line opening on the pipe insulation and using a couple pins to hold it in place.  It’s a great mark to follow to help get it going straight.  After the first rounds I just used the seams and edges to help me keep on track.

beginning

In this step I am putting all the rolled up layers on my table to start the basting process.  You can see the backing and batting in this photo.  I am spray baster.  My reasoning is that I like how the layers stay together and I never have puckering issues when I quilt.  I also like that I don’t have to deal with all the pins.  However,  I am very picky with the product I use.  I don’t want the ones that have all the fumes.  This type here is the one I always use.  I pick it up from Wal-Mart and I think it is a little cheaper than the one on Amazon I’ve linked to for you to see.  This one is unscented so there are no fumes.  I do however get the ceiling fan on high just to keep the air circulating during the process.

middle

As I got going, it ended up being very quick and easy.  I had the wall to stop the rolls from falling off and I unrolled away from me.  You can see that after I basted I folded over the completed parts and notice how smooth it is.

end

I would wish that my table be a little deeper, but I am just fine with it. This was a pretty big quilt and you can see how manageable it was to baste.  It works and I have a beautiful quilt sandwich ready for quilting.

So that being said, my goal for January 2019 is to get this quilted and binded.

omg 2019 splat

Here’s a picture of the quilt top.  I’ll show some progress later on the quilting.  I haven’t really decided what I will do with it yet.


Disappearing Hour Glass Quilt top

Well that’s all I have for now.

The linky parties I usually participate in can be found by clicking this link.  Please visit them and see what others are up to and  leave some comments and encouragement.  There are many bloggers out there who share their tips, projects, and tutorials to inspire us.

Thanks for stopping by.

Cherie

2018 Finishes · Christmas Gifts · OMG · Quilting · Table Runners

Back At It

Hi Everyone and Welcome to My Blog,

I’ve taken some blogging time off during the Holidays in order to focus on my family and friends here around my home. I hope that all my blogging friends had a wonderful time over the last couple weeks.  I am hopeful that I will be able to catch up on everyone’s blog and see what they’ve been up to.  I feel a bit overwhelmed however, since I have 400 emails in my box right now.  

I have an update in my employment situation.  If you’ve read my about page you know that I work for a major oilfield service company.  It has been a rough last couple years with the price of oil dropping.  I have seen quite of few of my coworkers laid off.  Five ladies in my division were let go and I still had my job and there’s.  It was always in the back of my mind that I would be next.  There is only two of us left.  The other lady is very good at her job and has been with the company from what I understand for nearly forty years.  She announced a couple of weeks ago that she will be retiring as of February 1st.  The next day I received a call from our division manager of his intent for me to take over her position.  I am very happy and grateful for her.  She has a new Granddaughter and wants to spend her time with her.  This has given me a better sense of job security.  I mean if she could retire from her position after all these years and market fluctuations that is where I want to be.  There is only one thing that makes this less than perfect.  Her office is 2 1/2 hours away.  I haven’t been asked to move, but there will be some sort of rotation for me to work there and my home base.  They are going to make this as painless as possible for me.  We have a driving service that brings our guy’s to the docks for them to catch helicopter or boat to the offshore rigs.  I will be able to use this service to travel back and forth.  They will also put me up in a hotel when I have to work for consecutive days as well as pay for my expenses.  For me this is better than having to move.  

OMG 2018 December (1)


Well, that’s enough about that.  Let’s see what I’ve been up to in my quilting studio.  My last post was about my December goal and my new studio setup.  I have to say I’ve been having a great time in there.  It is really one of my happy places.  

My goal for December was to finish up a few gift items and a cute table runner.  I made some car caddies, some oven mitts, and some pot holders.  I posted a picture of the car caddies here but I forgot to take  pictures of the oven mitts and pot holders.  I still have some fabric with grapes on it that I will make more from.  I’ll get some pictures then.  

I was also able to finish up the table runner.  I made up the dresdens and they came out very nice.  

Pattern

I laid them out in a pleasing arrangement and sew them together. 

dresden

Then I laid them on the white fabric and appliqued them on.  I didn’t do anything fancy.  I just used a straight stitch.  The dresdens were pretty busy and I didn’t want to add any more to focus on.  

block

Then I put it all together and quited an easy stipple.  And taa daa!

Finished


Christmas Gifts · OMG · Piecing · Table Runners

A Sewing Studio Rhyme

Hi Everyone and Welcome to My Blog,

There once was a boy who lived in a room.  He didn’t know much, how to use a broom. He grew up and moved away, his mom then said what a new day. Mom kept his things in case he came back to seed, but Grandparents flooded and had a need.

Well, I never claimed to be a poet, but this just popped in my head yesterday.  We spent the weekend bringing the bed that was in my son’s room to my husband’s parents home.  A couple years ago they were flooded with no insurance.  They are still recovering from this.  I have been sewing in 2 rooms.  My machine was in the office and my ironing station was in my son’s room.  With lot’s of fabric and stuff stored on the bed.  So I’ve been wanting to take the bed out and merge all sewing items in one room to have a convenient place for my craft.

So now I have the beginnings of a studio and I am ecstatic.   There was a bunch of cleaning necessary after moving the bed.  Apparently, son was using the space underneath as a trashcan.  At least it was only papers and not food items.  I might have had to give him a call to fuss.  Urrgh!!!!  I still have some organizing to do.  I’ll be looking on pinterest for ideas to manage my stash, but for now it’ll be amazon boxes and what I have on hand.  Here’s a look at it so far.  Isn’t that afternoon light coming in so bright.  It was wonderful until the sun was shining directly in my face, but I’ll be able to close the blinds at that point to cut down the glare.  IMG_0636 (2)

Do you notice that wonderful 8 foot table?  I’m hoping to keep the junk off it and have room to baste my quilts on it.  I’ve been crawling around the floor in the living room and it is not nice on the knees and back.  I’d like to give this method a try I found on You Tube.  I have the supplies ready to go as well as some quilt tops to experiment on.  I’ll let you know once I give it a try if it works and I like it.  I am open to other suggestions on this.  This will be goals for the new year.

OMG 2018 December (1)

Well on to my December OMG,  after I moved my machine in the room I  decided to try out my new space.  Back in September I received my Sew Sampler Box from Fat Quarter Shop.  It contained the makings for a cute table runner with dresdens on it.  I decided it fell in line with quick November and December projects that could be gifted for Christmas.  I haven’t tried dresdens or applique yet so this will be a new experience for me.

I sewed the charm pack and started marking off the dresends.  I decided to mark it then cut to make sure the little template wouldn’t shift.  I used the Fixion pens since I would be cutting on the lines and didn’t need to worry if the mark would stay since it would be in the seam allowance.

IMG_0633 (1)

Once I got them all cut out, I had a nice little stack ready to be sewn and turned.

IMG_0635 (1)

Here is the progress, lightly press in half and sew the ends.  I then flipped them out and pressed again.

IMG_0637 (1)

Sew, my goal for December is to finish this table runner in time for Christmas as well as a couple other items I’d like to make for gifts.

The linky parties I usually participate in can be found by clicking this link.  Please visit them and see what others are up to and  leave some comments and encouragement.  There are many bloggers out there who share their tips, projects, and tutorials to inspire us.

Thanks for stopping by,

Cherie


Christmas Gifts

Christmas is on the Way

Hi Everyone and Welcome to My Blog,

I hope everyone had a Happy Thanksgiving.  At my family’s house we ate too much then lounged around the living room visiting and watching football in the back ground.  We caught up with everything we have missed since the last visit.  It was a wonderful day with no drama or stress.  Everyone brought a little something so no one was over worked.  I am truly thankful for those people.

Now I’m in Christmas gift mode.  I love to give hand-made doo dads to my friends and family.  I think it is very personal and hope they appreciate the effort involved with the gift.

One of the things I’ve made so far is a car diddy bag.  I think it’s a nice bag that will hold things handy in the car.  I like that there is an almost hidden zippered pocket on the back that could stash a couple of dollars for emergency situations.  I am the worst about carrying cash in my handbag.  It seems to disappear awfully quick and then I don’t have any cash if I need a quick water or other small item.

I found this nice tutorial on Pinterest that would do just fine.  The tutorial expresses some concerns regarding the strap hanging on the shifter.  I measured to my car but I don’t intend to put anything heavy in it.  So I hope that won’t pose a problem.  There is also a part that shows to put velcro on the bottom to hold it in place.  I did try that on the first bag I made, but it didn’t stick to the carpet in my car.  Hubby said that the new carpets they are using now won’t work with hook and loop.  So I didn’t waste my time with this on the others.

Just a few pictures from my progress.  Here are all the pieces.  On outside bag  pieces I used some fusible batting and it kept it in place very nicely.  You can also see the outside pockets for the bag.  It looks like it would hold a pen and small pad of paper.

IMG_0620

This is where I was measuring for my zipper using this tutorial.  I’m not a big fan of inserting zippers, but I must say this one wasn’t so bad.

IMG_0621

I made the strap and sewed up the sides.  I then needed to close up the corners and put it all together and flip to the outside.  IMG_0622

Here is the back sides of the bags that show the zippers in place.  The first bag I measured wrong and find the zipper is a little close to the top of the bag.  It works so I just left it.  There was really no way to fix it.  Cest la vie.

IMG_0627 (1).jpg

After doing this a couple of times.  Taa Daa!  I now have three gifts ready for someones in a couple of weeks.

IMG_0631 (1)

The linky parties I usually participate in can be found by clicking this link.  Please visit them and see what others are up to and  leave some comments and encouragement.  There are many bloggers out there who share their tips, projects, and tutorials to inspire us.

Thanks for stopping by.

Cherie